
Configuring your domain name at Cloudflare DNS service is an easy task. Follow the following steps to correctly configure your Cloudflare DNS to work with MailRush.io
For our DNS setup, we will need the following records to be added to your Cloudflare DNS service:
- A TXT record for the SPF entry of the main domain
- A TXT record for the SPF entry of the subdomain
- An A record for the subdomain used in your MailRush.io account
- An MX record for the subdomain used in your MailRush.io account
- A TXT record for the public DKIM key
To start, go to your mailrush.io dashboard and click on “Settings” at the top menu:

At the “Settings” section you will find your Authentication Details which a set of DNS entries required by MailRush.io
Then, proceed to create the DNS records at Cloudflare.com:
1- A TXT record for the SPF entry of the main domain. Make sure to add SPF entry for any other mail server you are using :
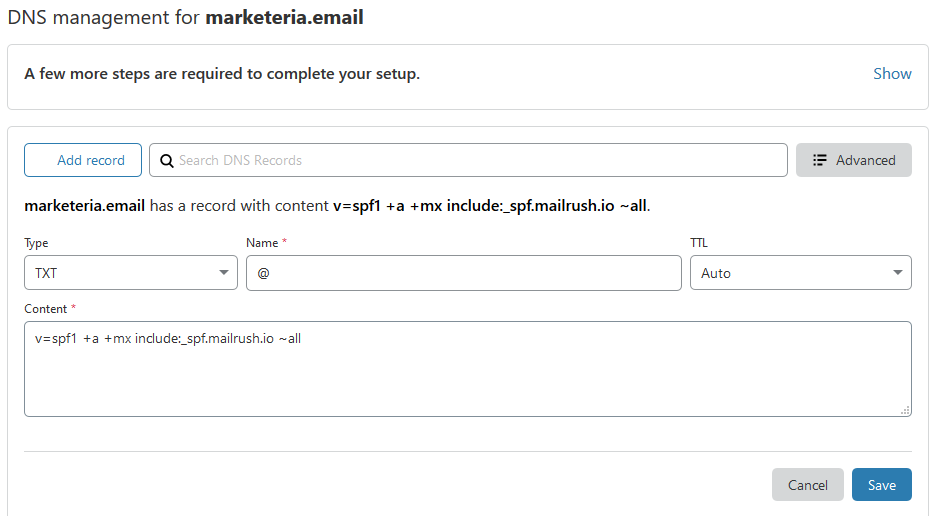
2- A TXT record for the SPF entry of the subdomain. For our example the subdomain is msdbu.marketeria.email:

3- An A record for the subdomain used in your MailRush.io account. Make sure you disable the Proxy feature for this entry (highlighted in green below):

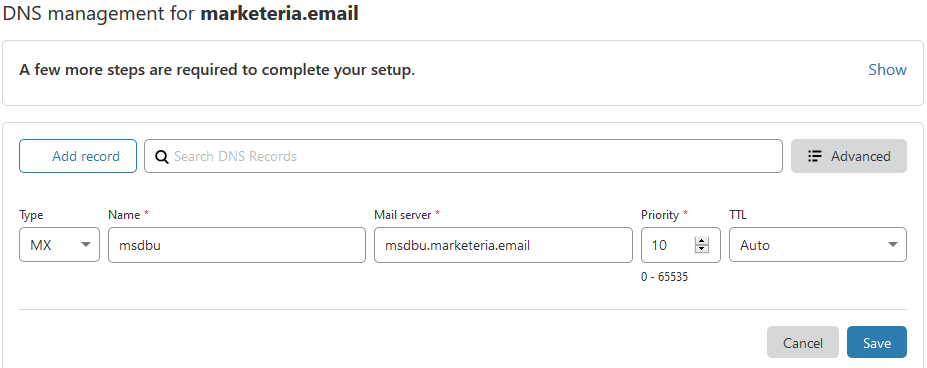
4- An MX record for the subdomain used in your MailRush.io account
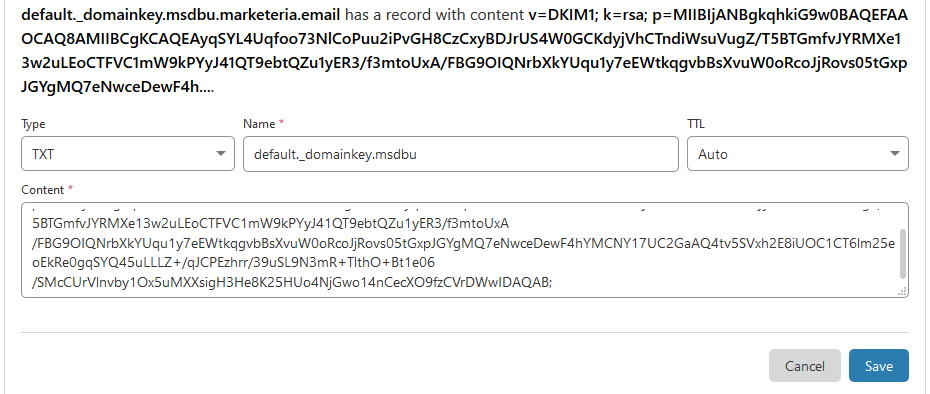
5- A TXT record for the public DKIM key
You should be getting a DNS setup similar to this:

Support DNS Records
In addition to the DNS records required for MailRush.io to work, you will also need to add DNS records unrelated to MailRush.io. This DNS entries may include www CNAME, other MX for your Emails servers, DMARC entry for the main domain among others.
Finally, allow some time for DNS propagation and test your account.